Zingtree supports SAML 2.0 based Single Sign-on (SSO). This lets you require anyone accessing a workflow to log in via your Identity Provider and authenticate themselves first. This article will walk you through how to set it up using Microsoft Azure.
Setup
- In Azure, Click Azure Active Directory.
- On the next page click on enterprise applications.
- Click on New application.
- Make sure Integrate any other application you don't find in the gallery is selected before hitting create. For best practices, we recommend creating separate applications for agents and authors.
- Choose option 2, Set up single sign-on and click Get started.
- Click SAML > Basic SAML Configuration
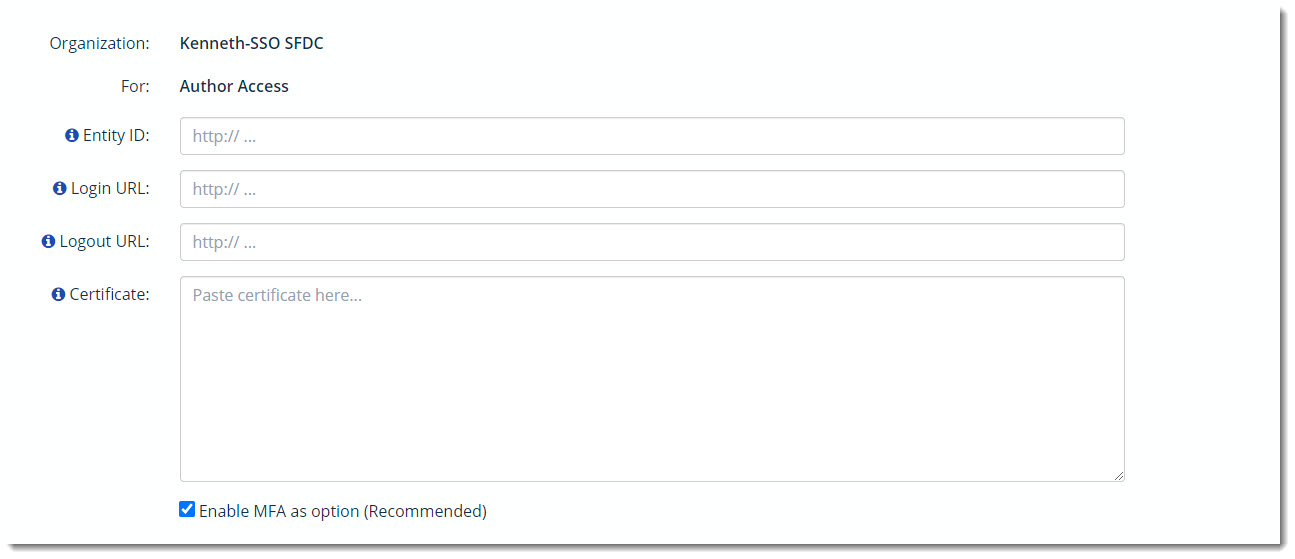
- In Zingtree, go to Team > SSO
- Click Next: Enter Identity Provider Data for Authors/Agents button. In Azure, select Enter Identity Provider and then input the Entity ID, Assertion Consumer Service (ACS), Logout Url (SLO) you got from Zingtree.
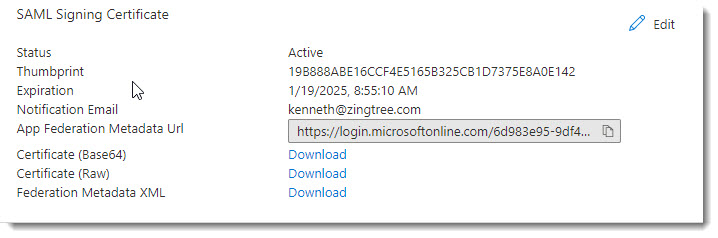
- Download the Certificate (Base64) in SAML Signing Certificate. Open the Certificate file with an editor or Notepad. Copy and paste the information into the Certificate field in Zingtree's Enter Identity Provider.
Enabling SSO for Agents/Authors
Once SSO is working properly from your test, you can restrict access to any workflow as follows.
- From Team, Single Sign-on, make sure you are on the Agents/Authors page.
-
Tick enable Agents/Authors.
IMPORTANT: You still need to specify individual workflows to restrict access to. Here’s how:
- Go to My workflows, and select the workflow that you want to require SSO login.
-
Click Settings > Security, and you’ll see something like this:
- Check Require Login via Single Sign-on (SSO).
- Click Update Settings.
Dedicated Agent Login
Rather than having Agents go through the Zingtree login page, you can send them directly to your SSO login page. Here’s how:
- Go to My Team, My Agents.
-
Give your agents the link from this button: