Important Effective February 14, 2024, your email domain must be verified to ensure delivery! Please click here to set up your domain verification.
Buttons can be used to open an Email Node, which can be a preconfigured email form. The email you receive will include the visitor's message, as well as a log of your visitor's current session. This is really helpful when answering support questions, so you can see what the customer has answered. You can also include attachments with an email.
Example
When a user reaches an email node that has been set to use a form before sending, they get an email form like this:

When the user clicks Send Message, you receive their message and the entire Q&A of their Zingtree session, along with any data entered. Here's an example of what you might receive from an email node.
The customer's message is here.
Zingtree session data:
Q: How will you be using the Zingtree workflows you build?
A: Request a Demo
Q: Next:
A: Continue
Q: How will you be using the Zingtree workflows you build?
A: Internal Use
Q: Are you looking to integrate Zingtree with other applications?
A: Yes
Q: Next:
A: Continue
Q: Are you interested in self-hosting Zingtree?
A: Yes
Q: Next
A: Continue
Q: Finish:
A: Send Demo Request
score: 0
name: Joe Customer
company: XYZ Corp.
email: joe@xyz.com
contact_number: 800-237-9383
How to Create an Email Form Node
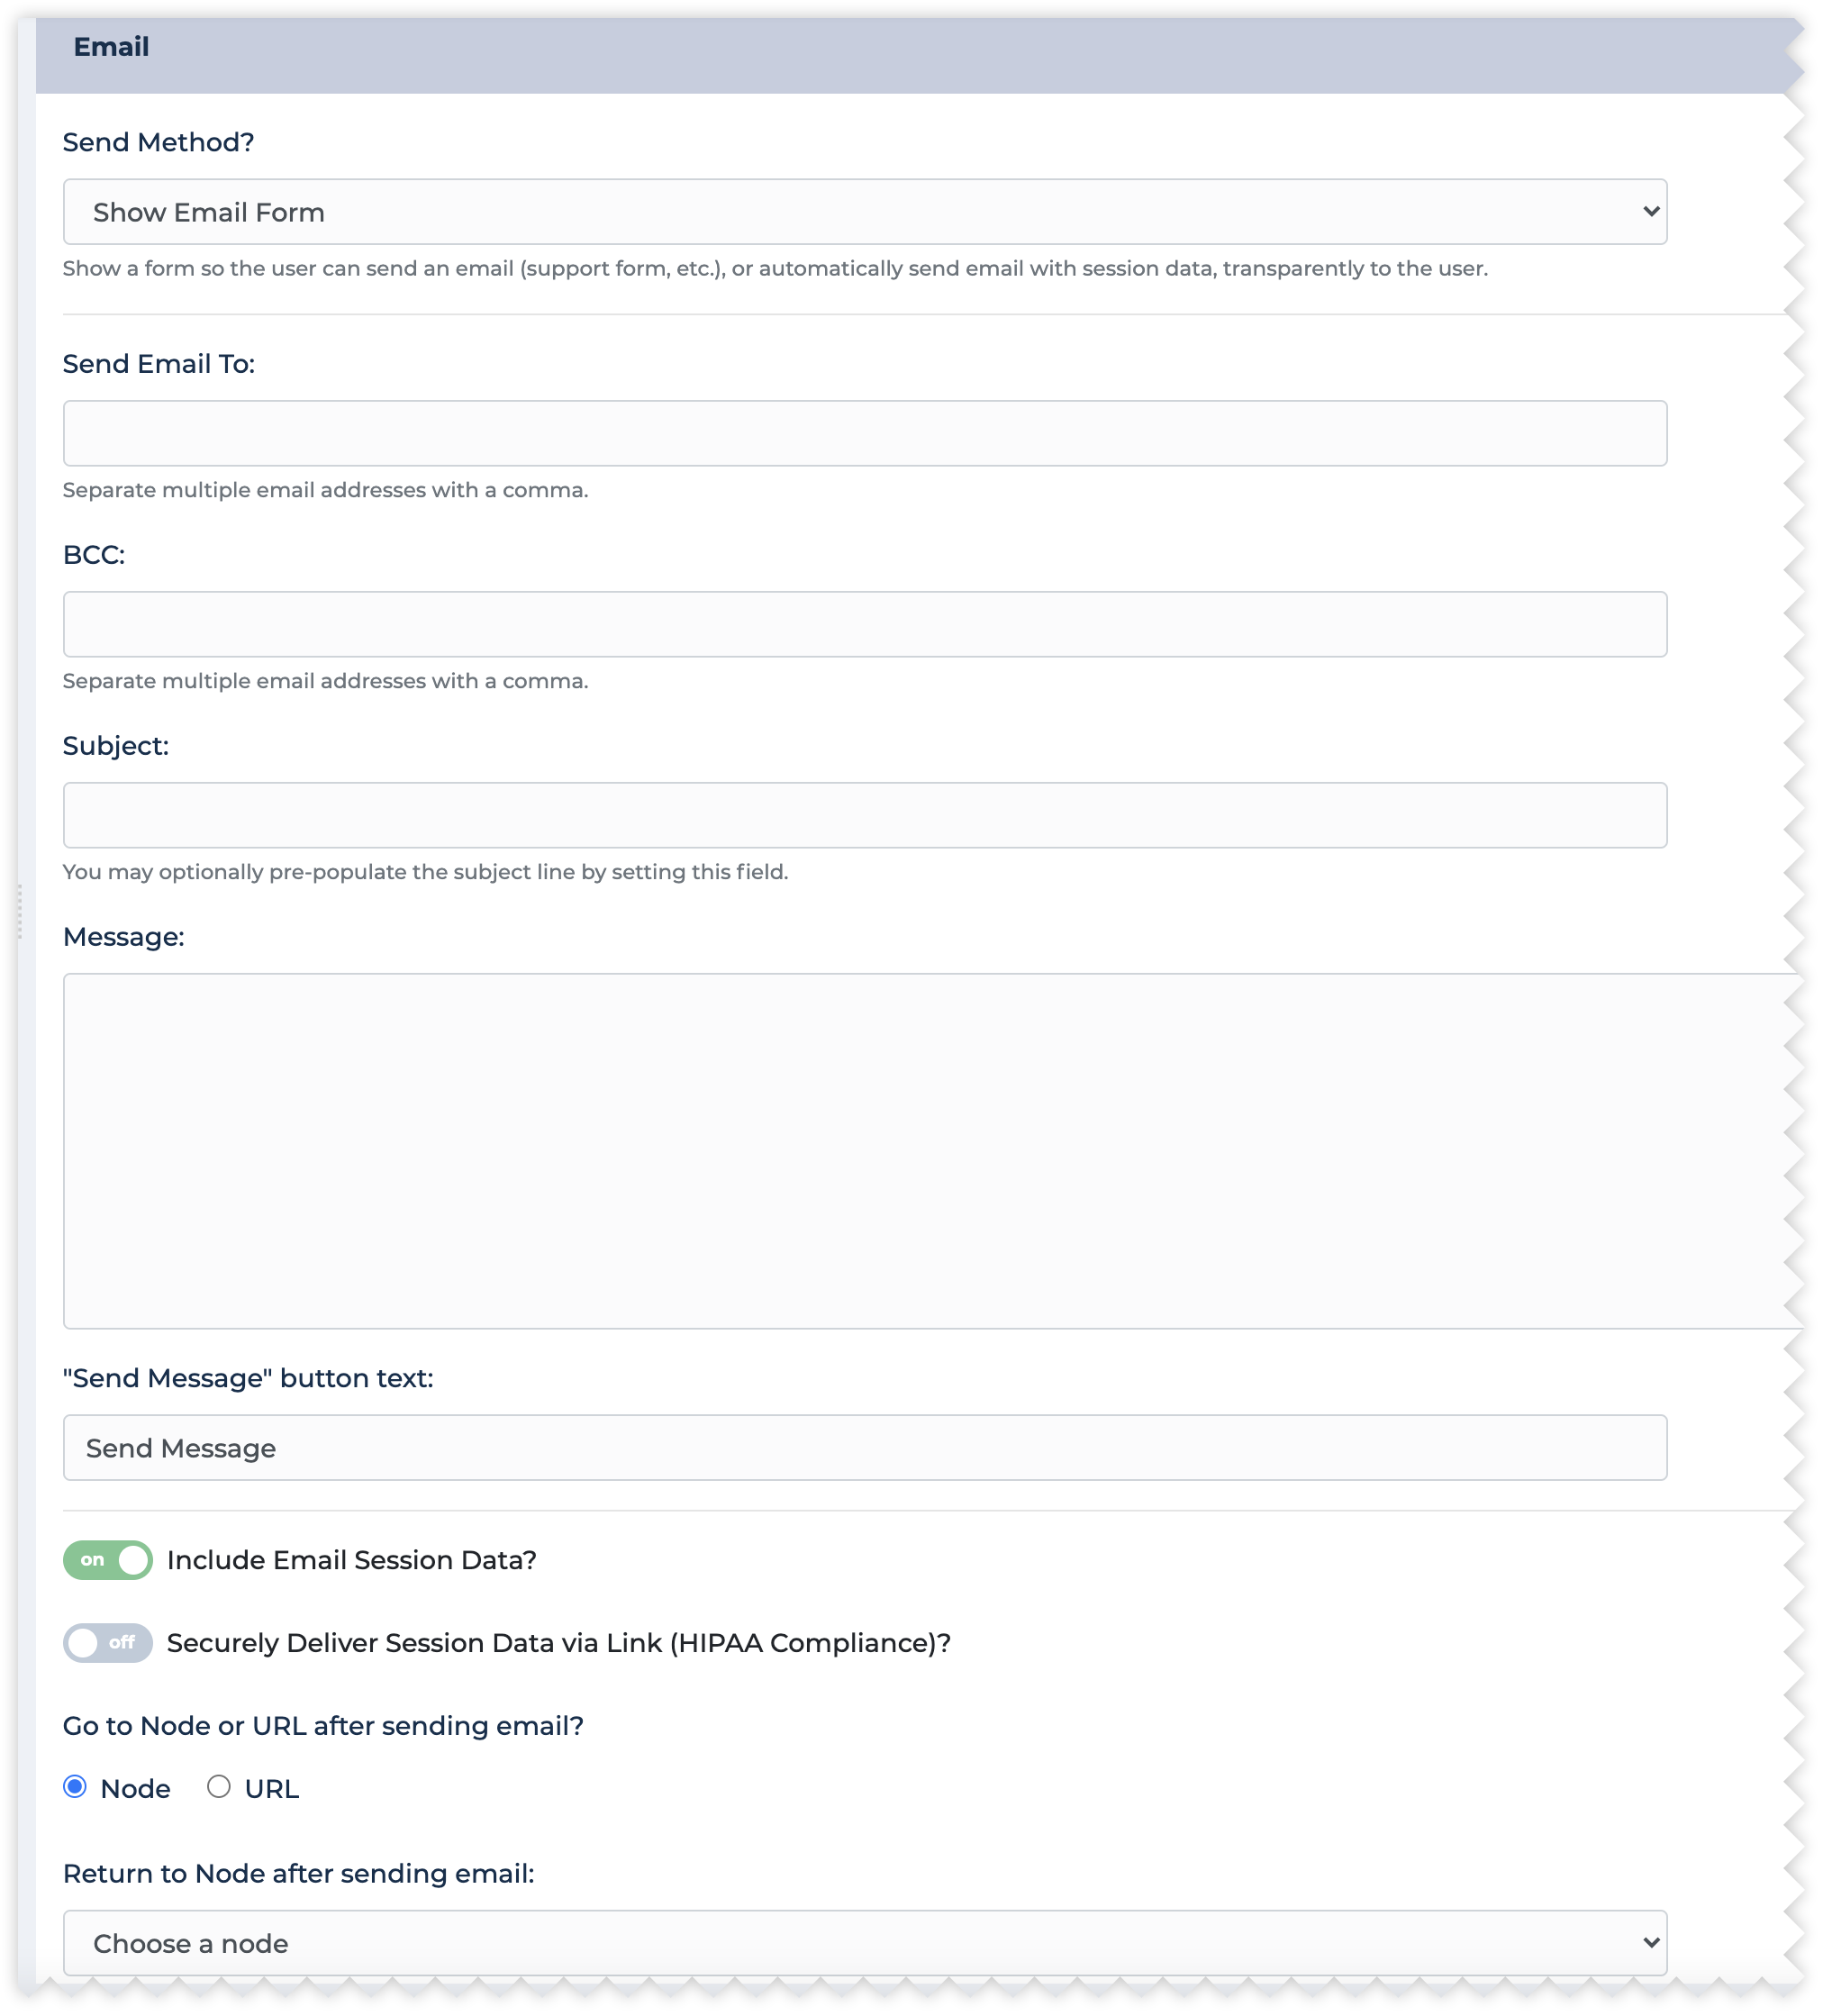
To link a button to an email submit form, create an Email Node as follows:
- Click + New Node or add an action button to a current node that connects to a new node.
- Select Email Node as the node type. The Email Node editor appears.

- For the Send Method, select Show Email Form.
- In Send Email to, enter the delivery email address. You can enter multiple recipient email addresses separated by commas.
- You can enter a default subject or message. These are pre-filled in the email form.
- Check Include Session Data in Email to include the Q&A transcript, and any data collected in the email. You can also check "Securely deliver session data via Link", which will provide a link to the session information, instead of including it in the email body.
- In go to Node or URL after sending email, choose a node to go to next. Or, choose Go to URL, and enter a URL to launch instead.
- Make sure that you've connected an action button to the new Email Node.